System Contexts
Overview
System Contexts provides a way for enterprise customers to control access to systems based on the role or responsibilities of the employee using SysTrack. It allows you to stop employees from accessing sensitive or cross region systems directly from Assist, Resolve, and direct dashboard or AppVision queries.
Systems can be assigned to a system context group. This is different from a normal SysTrack System Group that is used for segmentation of data.
SysTrack Permission Groups can then be mapped to System Context Groups. When you use this feature, you can control which specific groups of systems that your users can access using Assist and Resolve, and direct system queries from Dashboards.
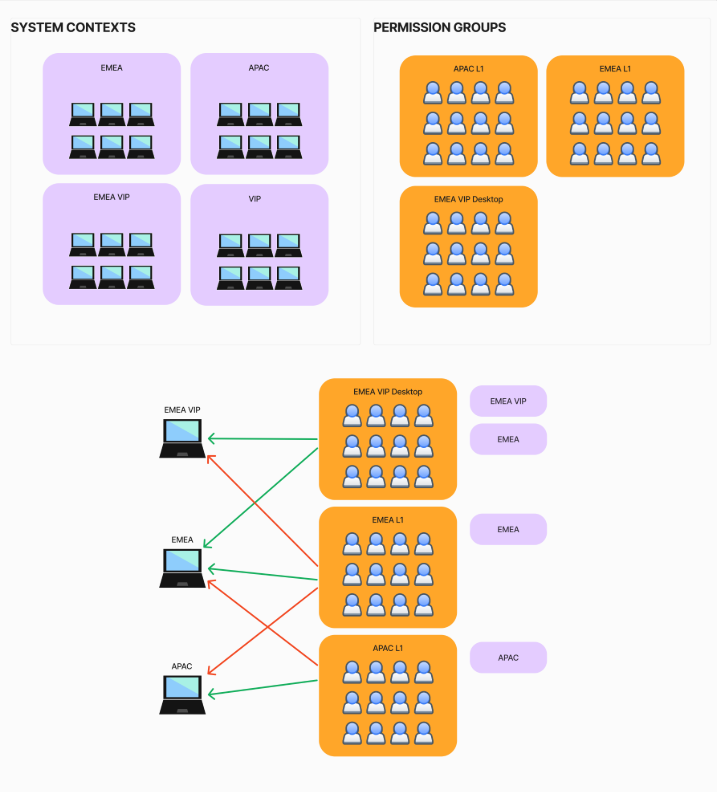
Example: Permission group to Context group mapping
NOTE: For On-Premises, System Context configuration is only available on the Global Master.
Prerequisites
A system is assigned to a context group by setting a parameter at the point of installation (contained within the command line or install script). The parameter is derived from the context name. A system can only be a member of one context.
Post installation, the parameter can be updated to change the context group a system is assigned. It can be changed by following the guidance in the OS specific install guide:
-
Windows - this key will be set: “Computer\HKEY_LOCAL_MACHINE\SOFTWARE\WOW6432Node\Lakeside Software\Deploy CONTEXT”
-
Linux - by default it will appear as Context=X in the /var/opt/lsiagent/lsiagent.cfg file
-
MacOS - by default it will appear as Context=X in the /Library/Application Support/Lakeside Software/lsiagent.cfg file
Context groups will automatically populate on the SysTrack Master or you can pre-populate your context groups before you deploy agents.
Pre-population of context groups is useful for building out your RBAC model before deploying agents. You MUST ensure that the context names you pre-populate exactly match the parameter you provide for the system.
Context names are limited to 25 characters.
IMPORTANT: If you do not want to use this feature, do not set any parameter for system context groups as part of your installation. Systems without a context parameter will be assigned to the [Default Context]. By default, the All Users permission group has access to systems in [Default Context]..
Work with Context Groups
Go to Configure > SysTrack Setting > System Contexts
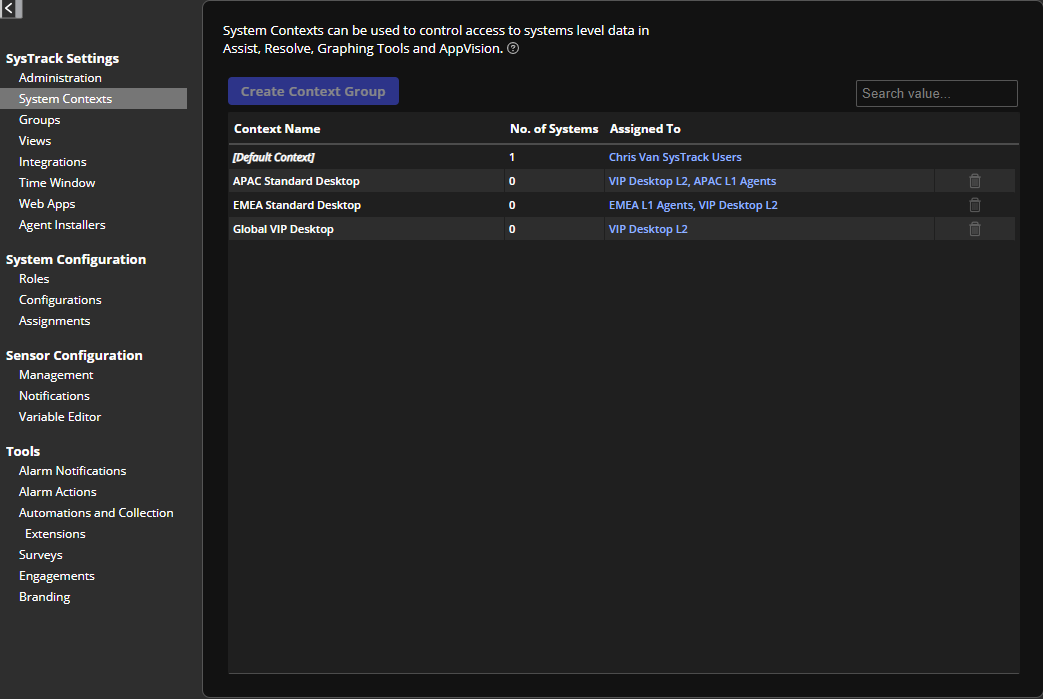
There are two ways to begin using System Contexts:
-
Populate the System Contexts and assign permissions before you roll out the agent.
-
Allow the System Context Groups to populate once agents are upgraded and condense their context.
The preferred method is to Define System Contexts > Assign Permissions > Deploy agent using deployment tool.
For example, an existing customer may choose to deploy the 11.3 agent with the context parameter set, after the agents report in those contexts will be reflected in the console, you can then map permissions. Be aware that agent populated context groups will initially have no permissions mapped to them.
Create a Context Group Manually
-
Click Create Context Group
-
Enter a Context Name, for example Support Level 1.
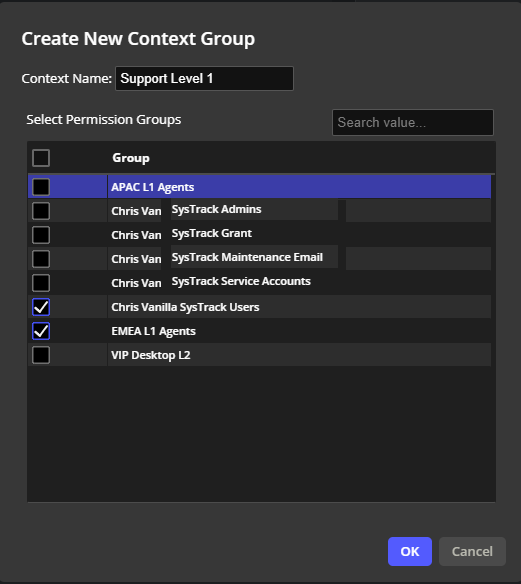
-
Select the group (or groups) of users that you want to have access to any system that is included in the newly created Context Group.
-
Click OK.
-
You can see the newly created group in the list which will show 0 in the number of systems column. This number will increase as systems report in with that context.
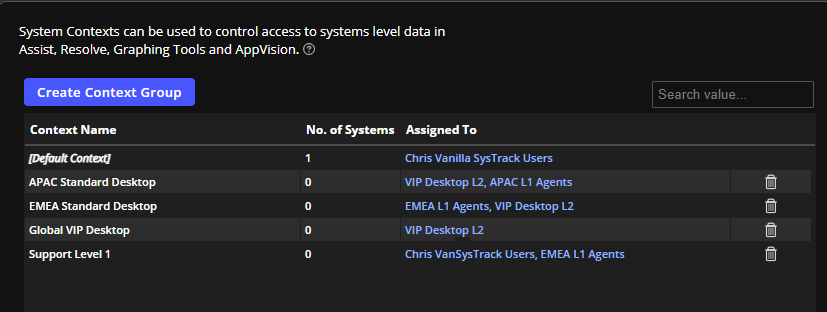
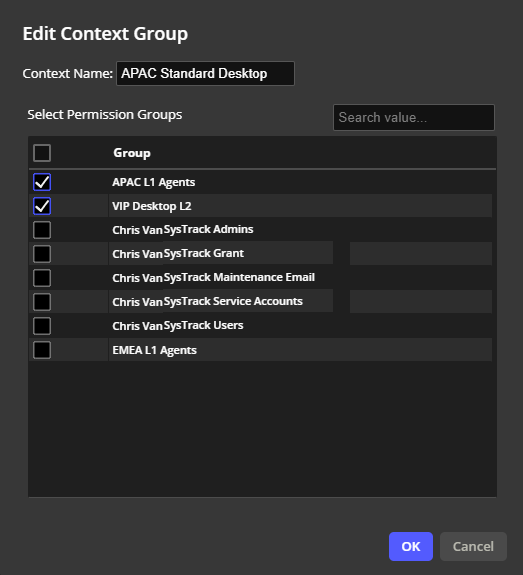
Edit Context Group
-
Click the information in the Assigned To column.
-
Check or uncheck what you want changed in the group.
-
Click OK.
IMPORTANT: You can not edit the context group name. When you rename a context, it must be completed from the agent side. through an updated context parameter.
NOTE: Changes to permission groups assigned to a Context will take a few minutes to take affect.
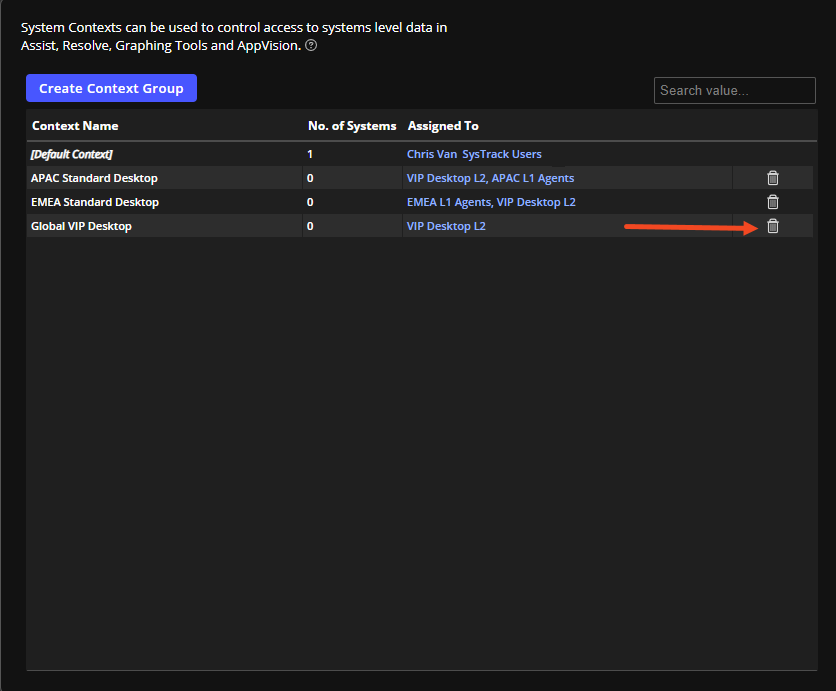
Delete Context Group
NOTE: You can only delete a system context that has 0 systems assigned to it.
-
Select the group you want to delete.
-
Click the delete icon.
-
Click OK.

-
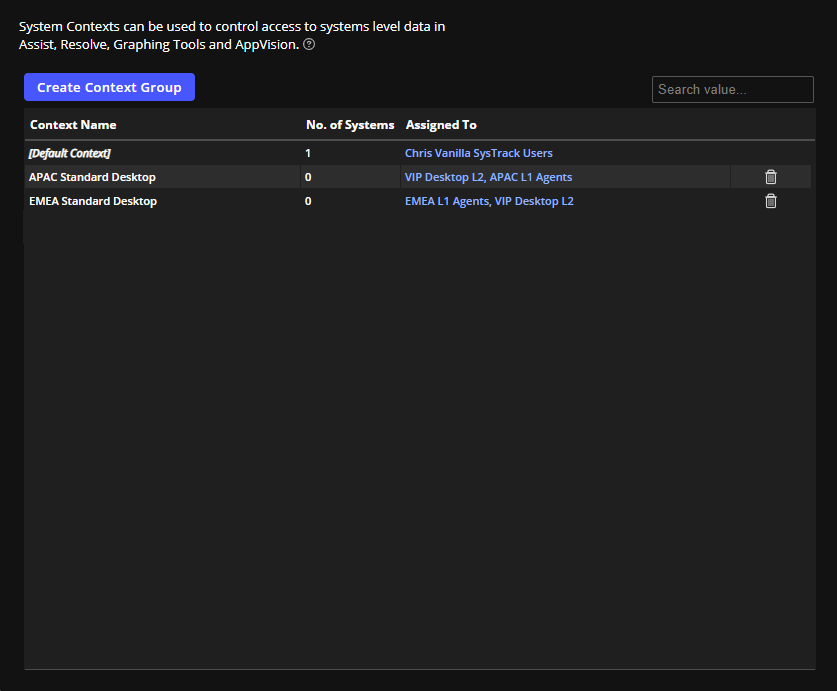
It is removed from the list.
Change a System Context Group
It is possible to move a system from one Context Group to another. For example, a user's system in the EMEA Context Group may need to be moved to the APAC Context Group.
To do this, you will need to change the Context Group in either the registry (Windows) or Config file (MacOS/Linux). Deploying a change through SCCM, InTune, etc. is the best way to do this.
IMPORTANT: For MacOS/LInux, after the change is made, the agent needs to be restarted to read it.
Mobile Agents
You can specify System Context Group parameters for mobile devices that are on iOS or Android.
This is also limited to 25 characters.
For Android, the agent is deployed by Mobile Device Management (MDM).
On This Page